How to Make a New Filter (with the Wizard)
Prompt filters are a great way for users to dynamically filter the data feeding the visualizations in reports displayed in dashboards, giving even end users the ability to interact with dashboards. For more information on prompt filters and their variations, see Filter – Inzata Support.
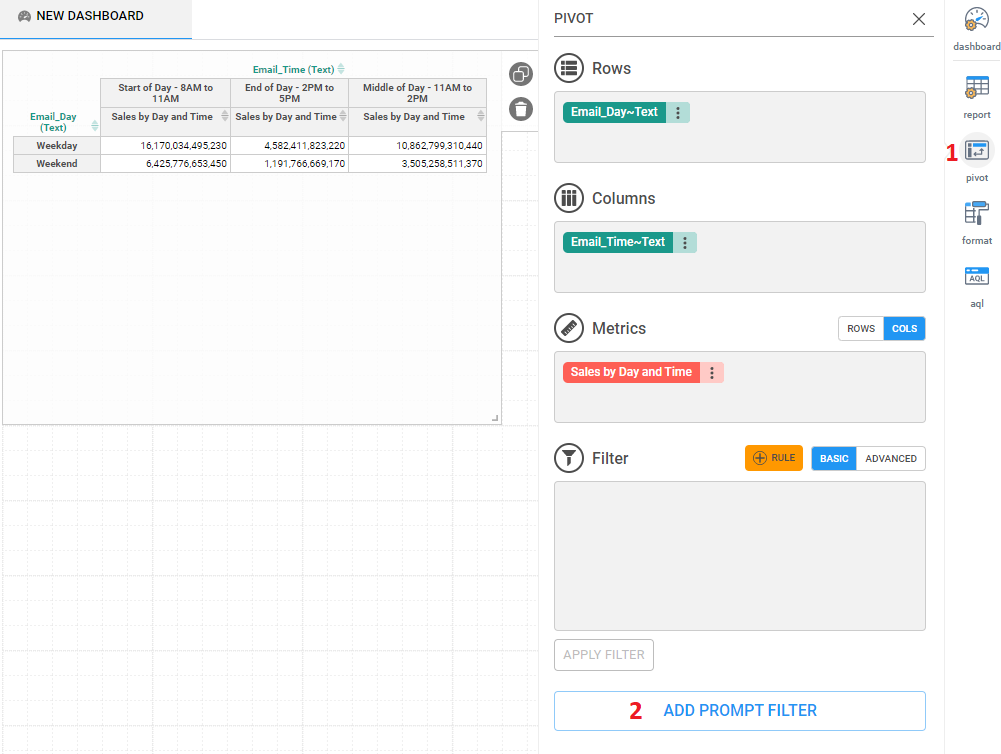
Using inBoard, there are 2 ways to create a prompt filter, the prompt filter wizard and the manual route. The wizard has 3 steps: Select Elements, Filter Property, and Create Controller. To run the wizard, first open a dashboard in inBoard and click on a report widget to open the side panel on the right for editing the report. Once that has been done, the right side panel typically opens to the pivot menu (1), if not it should be opened. The user should then click “Add Filter” button (2) in the pivot menu.
Step 1: Select Filter Elements
The wizard will now open to step 1: Select elements. Once the wizard panel opens, the user must pick an attribute on the left side of the panel first, then select the type of data to use for the control filter. In most cases, the type of data will be “Text” as shown below. Picking an attribute and data type will cause Inzata to populate the right side of the panel with its values so that the user can pick a default value for the filter. This is done by clicking on a value to select it. If the user does not want a default value to be set in the control filter, then they can proceed by selecting either the “—” value or by not picking any value. To go to step 2, click next.
Step 2: Name and Choose Filter Type
For step 2, the user picks the title that will display at the top of the filter and also picks the type of filter that will be used. The user can write the title in the text box and format the text by highlighting it and using the formatting options. The filter type can also be selected from one of the available options.
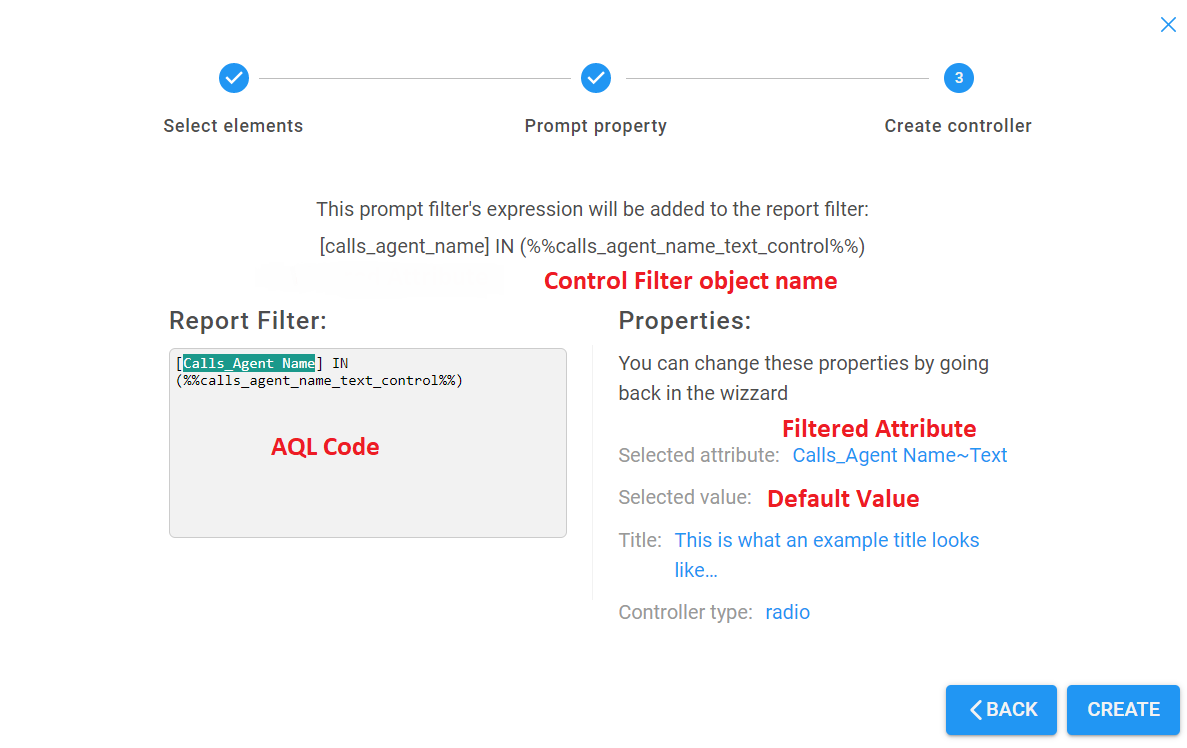
Step 3: Review and Create Filter
Step 3 entails a quick review of the key aspects of the control filter. The control filter object name is automatically chosen using the wizard, but it can be changed later in the settings of the control filter. The different fields present for review are the filtered attribute name, the control filter object name, the default value for the control filter, the title of the control filter displayed on the dashboard, the controller type, and the AQL code that goes in the filter field when editing a report. To finish the wizard and make the control filter, click create.